Tish · Work In Progress

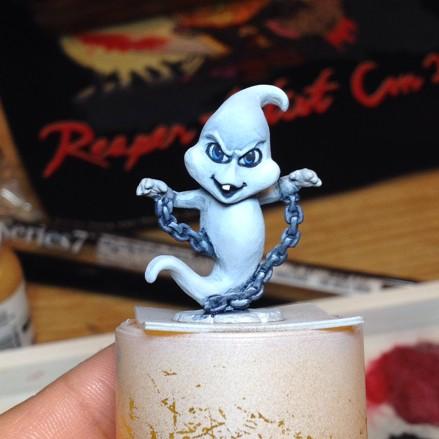
A few days ago, I started Tish, one of the Bonesylvanians from the Reaper line. I'd already finished painting Gus, and she's up next. She's super cute with her little vampire teeth and I wanted to paint her a bigger, more dramatic mouth. I may have gone a little overboard, but if I paint her some dynamic eyes to match, I think we'll be good.

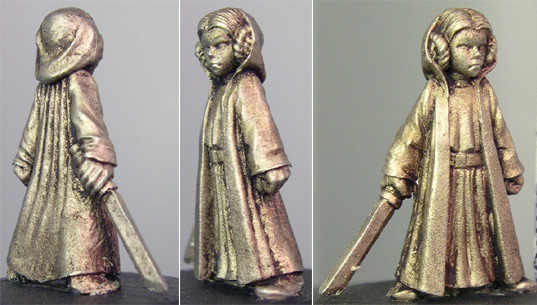
I started off cleaning her up with my files to rid the sculpt of any mould lines. I noticed a small little pockmark on the bridge of her nose. It looks like she may have been a victim of a minuscule mould bubble, and I wanted to fill it in before I primed her. Since it was so small, I was hesitant to use Green Stuff or Milliput, so I used some flowable composite, basically super-glue that cures with light. I knew it would adhere to the inside walls of her little pockmark so I filled in the hole, stuck it under a lamp & left it to set overnight. 

The next day I primed her, and realized there was a bit of texture leftover that shows through the primer. I should have used some of the tiny files to smooth out the nose beforehand. Oh well, live & learn! Hopefully once I paint in her eyes, hair & eyebrows, it won't be noticeable. Next up, I base coated her robe gown in a dark grey, painted the inside of her cloak a dark green to differentiate it (for now), and started on her face. Being a vampire, she should have a fair complexion and dark, dramatic eyes & lips. I may go back in when her face is painted and lightly glaze the shadows with some grayish green if she still looks too healthy. 

Here's where the fun part comes in! While I haven't decided on which color & direction to paint her eyes, I knew I wanted to paint Tish a wide, toothy smile. First, I painted her teeth in an off-white and blocked out her new mouth shape in a dark red. I extended the lines to the outermost edges of her mouth sculpt. Then I cleaned up the edges with skin color in places that needed it and chose a brighter red. Painting in layers, I kept the bright red color on the inside of the dark red shape and focused the pigment toward the center of her mouth, where her lips are the fullest. Lastly, using Pure White, I highlighted her lips where I imagine light would reflect if she was wearing shiny lip gloss. 

There's plenty more to paint, and I can't wait to do some more work on her eyes. Hoping to make some significant progress on Tish this weekend!
Reaper Artist Conference Day 2

I'm back with more Reaper Artist Conference information! I love my "Best Vampire" trophy with the sculpted chattering vampire teeth conversion-- so much that I created a new Instagram account so I could start sharing videos. If you can hear it, my giggle at the end of the video is proof that I'm genuinely amused. (For some reason, the sound only works when I open the Instagram link on my phone, but not in my web browser).

While I finally have pictures of my miniature, they're washed-out and awful. I'm glad Christmas isn't that far away-- I sure know what I'm wishing for! I'm also in the process of building/acquiring a light box. I'll need to take some better pictures of him before I feature him on my Work page. I originally painted him for our Halloween-themed one-off D&D game, and I'm glad I did!

My "Best Vampire" Reaper Artist Conference trophy just makes my day

A video posted by Mocha (@mocha_minis) on

mocha_minis's video on Instagram

First up on Day 2 of RAC was "Crafting Creepy Halloween Trees" where Julie Guthrie showed us how to create trees using some wire, glue, and pliers. I love it! While I'm not familiar with basing (but I'm eager to learn), this class was a great bridge between basing & sculpting. I felt like I was able to make something creative without graduating to the intimidating green stuff. I'm also convinced Julie's hands have magic in them. Armed only with paperclip and some pipe cleaners, I'm sure she could find a way to sculpt something interesting and unique! Looking forward to using this technique to create a tree base for all the great Halloween minis I bought at the event.

Next up was Bob Ridolfi's "Crafting Your Own Graveyard Base" where we used simple materials to craft a spooky base ready for a Halloween-themed miniature. Of course, my finished base will look much different once it's primed and painted! I especially enjoyed Bob's sense-of-humor and his fun approach to what I now call "resourceful basing". Found objects really do make the best basing materials! I also had my first experience with "green stuff" and I'm happy to be learning more about sculpting & basing in small increments-- baby steps!

Lastly, Derek Schubert's "Freehand Painting Techniques" class. Derek broke down the intimidating prospect of freehand painting into approachable steps. I was able to take a photo of the demo example miniature (though it's a bit blurry). This was the largest class that I attended at RAC with attendees of all ages & experience levels. Derek did a nice job passing around examples of his work While there's no substitute for experience and practice, I'm far more likely to try my hand at this technique on one of my next miniatures! 

As with these miniature events, I found wonderful things to add to my miniature hoard. Reaper has recently come out Bonesylvanians, a line of chibi-style Halloween-themed miniatures. They're terribly adorable with their big eyes & I just couldn't help myself. Needless to say, I now own them all. I've already done some work on Gus, though he's still a work in progress. Hoping to finish him and paint a few more on Halloween! 

Miniature Monday · October 19

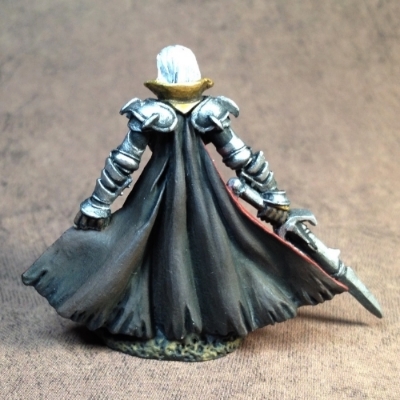
Happy Miniature Monday! I did some work on Lord Ironraven this weekend & updated his WIP page. I never thought he'd turn out well enough for me to want to finish painting him. Honestly, he was just supposed to be a practice in silky fabric texture but has turned out to be much more!

Not only have I practiced silky fabric & TMM (True Metallic Metal), I'm trying blue/black hair and painting jewels on this mini. Below are the steps I took to paint the jewel on his shoulder armor section. [Click on the image for a larger view]

I'll need to get creative in how to make a respectable base post-paint job (shame!), but otherwise, I'm really happy with how he's turned out so far. I usually only try one or two new techniques per mini, but Lord Ironraven has been a study in silky fabric textures, TMM (True Metallic Metal), blue/black hair, and painting jewels on flat surfaces.

Today also launches the next Speed Paint Challenge! This time, the miniature suggested & chosen is a Hasslefree miniature: 

This time, the Speed Paint Challenge timeline is a bit different: we'll have one month to order, ship & paint this miniature for anyone who wants to participate. Everyone is welcome! On Monday, November 16th, we'll share our results through social media (using the #speedpaintchallenge via Twitter) and I'll be posting my own process here on my blog. The rules are still the same and we'll have four-hours-or-less to paint. I'll be ordering my Hasslefree miniature on Monday-- more information to come!

In other news, I'm relieved to report that the saga of the stray dogs has continued on to its next adventure. Over the last week I helped shelter two young strays from two powerful storms that blew in, and drove them across town to a vet who would examine and hold them for three days while I tried everything I could to find their owners. Sadly, it became apparent that they were abandoned, so I dipped into my miniature savings and paid for basic vet exams, flea medications, and admittance into a local, reputable shelter. I admit, I wish I could have taken them in and/or adopted them myself and it was so hard to say goodbye. One day, I'll have the means to foster & help more, but in the meantime, I know I did everything I could to help them. With a little more luck (which they've had plenty), they'll soon find their new & loving forever homes!