Speed Paint Challenge

Lately, I've been contemplating on how speed painting might help me develop into a stronger miniature painter. When I attended ReaperCon, I had the privilege of picking the brain of Derek Schubert, miniature painter, sculptor, and speed painter extraordinaire. Sometime soon I need to write a blog post about the totally awkward (on my part) yet inspiring experience. I've wanted to write about it since early May. Stay tuned for that!

Since then, I've realized that there is no magical element or secret to speed painting. In fact, I firmly believe that it's all in the approach. The more preparation there is, the less likely you'll need to repaint sections of the miniature due to impulsive and/or poor decisions (mostly regarding color). In my opinion, speed painting is most successful after thoughtful and clever planning. It doesn't take much, and the initial thought that you put in will definitely show. I truly believe that Derek Schubert can analyze a miniature and "see" the final application of colors coming together on a finished miniature before he even picks up his paint brush. The man just doesn't make mistakes. Again, I digress!

My first speed painting endeavor was a failed attempt because I just didn't plan well. I picked colors I liked, and since I had a hard time narrowing them down, I attempted to use them all. I started slapping paint on the miniature, focusing only on the speed in which I applied paint. I didn't want to take time to layer colors for smooth blending, so I didn't thin down my paint. Once I realized my mistakes, it was too late. My alternatives were either repainting sections while building unwanted chunky textures or rethinking the entire color scheme. It was frustrating. In the end, I named him Skittletor after the candy with the slogan "Taste the Rainbow". Skittletor looked like he lost a fight with an angry color wheel. Red, brown, orange, red, teal, navy blue-- he had it all. While I don't consider him a painting success, I learned some valuable lessons in the process.

I found I prefer very tight color schemes. In the past, I tried to use more colors in the hopes that it would result in a more dynamic miniature. Instead, I like using one or two bright colors and a few neutrals. It keeps the focus in places I want to highlight, and having only one or two main colors keeps other parts of the mini from competing for attention. In addition, I'll use different shades of the same color in several places on the miniature to create an overall visual unity.

I also fully admit: I struggle with metals. Despite looking up real metal image references, I find it difficult to find where the light reflections are supposed to fall when considering the light source. I think using metallic paints are an easy way around this, however, I find the final effect highly distracting when compared to the matte paint finish on the rest of the mini. Any highlights I paint on matte surfaces are often upstaged by natural light reflections in the metallic paint that are beyond my control. Because of that, I try to avoid painting metal when speed painting-- at least for now. My speed painting will involve honing skills and finding ways to apply them more efficiently, not attempting to solve my most difficult painting barriers... which brings me to the Speed Paint Challenge!

Recently a Twitter friend & fellow miniature painter took my Genasi Warden speed paint exercise and turned it into a personal challenge. He used the same Reaper Bones miniature with similar paint colors-- he did a great job given only 2.5 hours! I decided to continue the fun and invited him to join me in a #speedpaintchallenge with a new Reaper Bones miniature and we agreed to these guidelines:

Speed Paint Challenge Rules

  • Colors: 6 earth tones, 2 neutrals [+ 1 metallic if needed]
  • Time Limit: 4 hours or less
  • Miniature: Elquin, High Adventurer · Reaper Bones #77092 ($2.49)
  • Deadline: next Miniature Monday : September 1st, 2014

Here's my chosen color scheme:

Reaper paints shown [L to R]: Linen White, Pale Green, Viper Green, Pine Green, Muddy Brown, Golden Shadow, Golden Highlight, Brown Liner

We'll both feature our results via Twitter and I'll include my process in next Monday's blog post. Let the speed painting begin! 

Speed Painting

On Saturday, it was rainy-- the perfect weather for painting! I decided to give something a try: Speed Painting. Now, most people would describe speed painting as painting under limited time constraints. I took it as a challenge to finish a miniature in an afternoon. I haven't completed a miniature in one sitting since The Blind Ninja in 2013. The idea of "Speed Painting" used to intimidate me so I decided to reverse-engineer the process to make it more accessible. It helped! 

I gave myself the challenge of finishing the miniature in three 30-minute intervals. I set a timer on my phone for 30 minutes and took a few minutes break in between to re-evaluate and plan what to paint next on the miniature. My strategy for the three intervals was this:

  1. Base Layer for Cape, Lining/Outlining of Middle Armor Sections
  2. Skin, Face, Eyes
  3. Weapon, Shield, Wash on Cape Layer

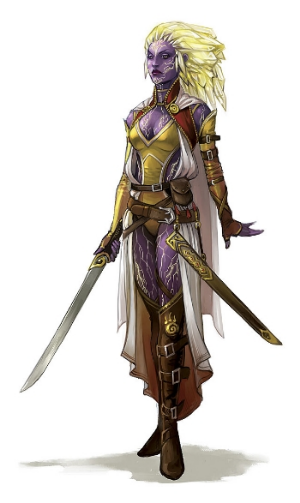
Last week, I wrote about helping my friend build a new D&D character. My friend wanted her Genasi mini to have "purple skin with hair like lightning" so I used this as an overall concept reference:

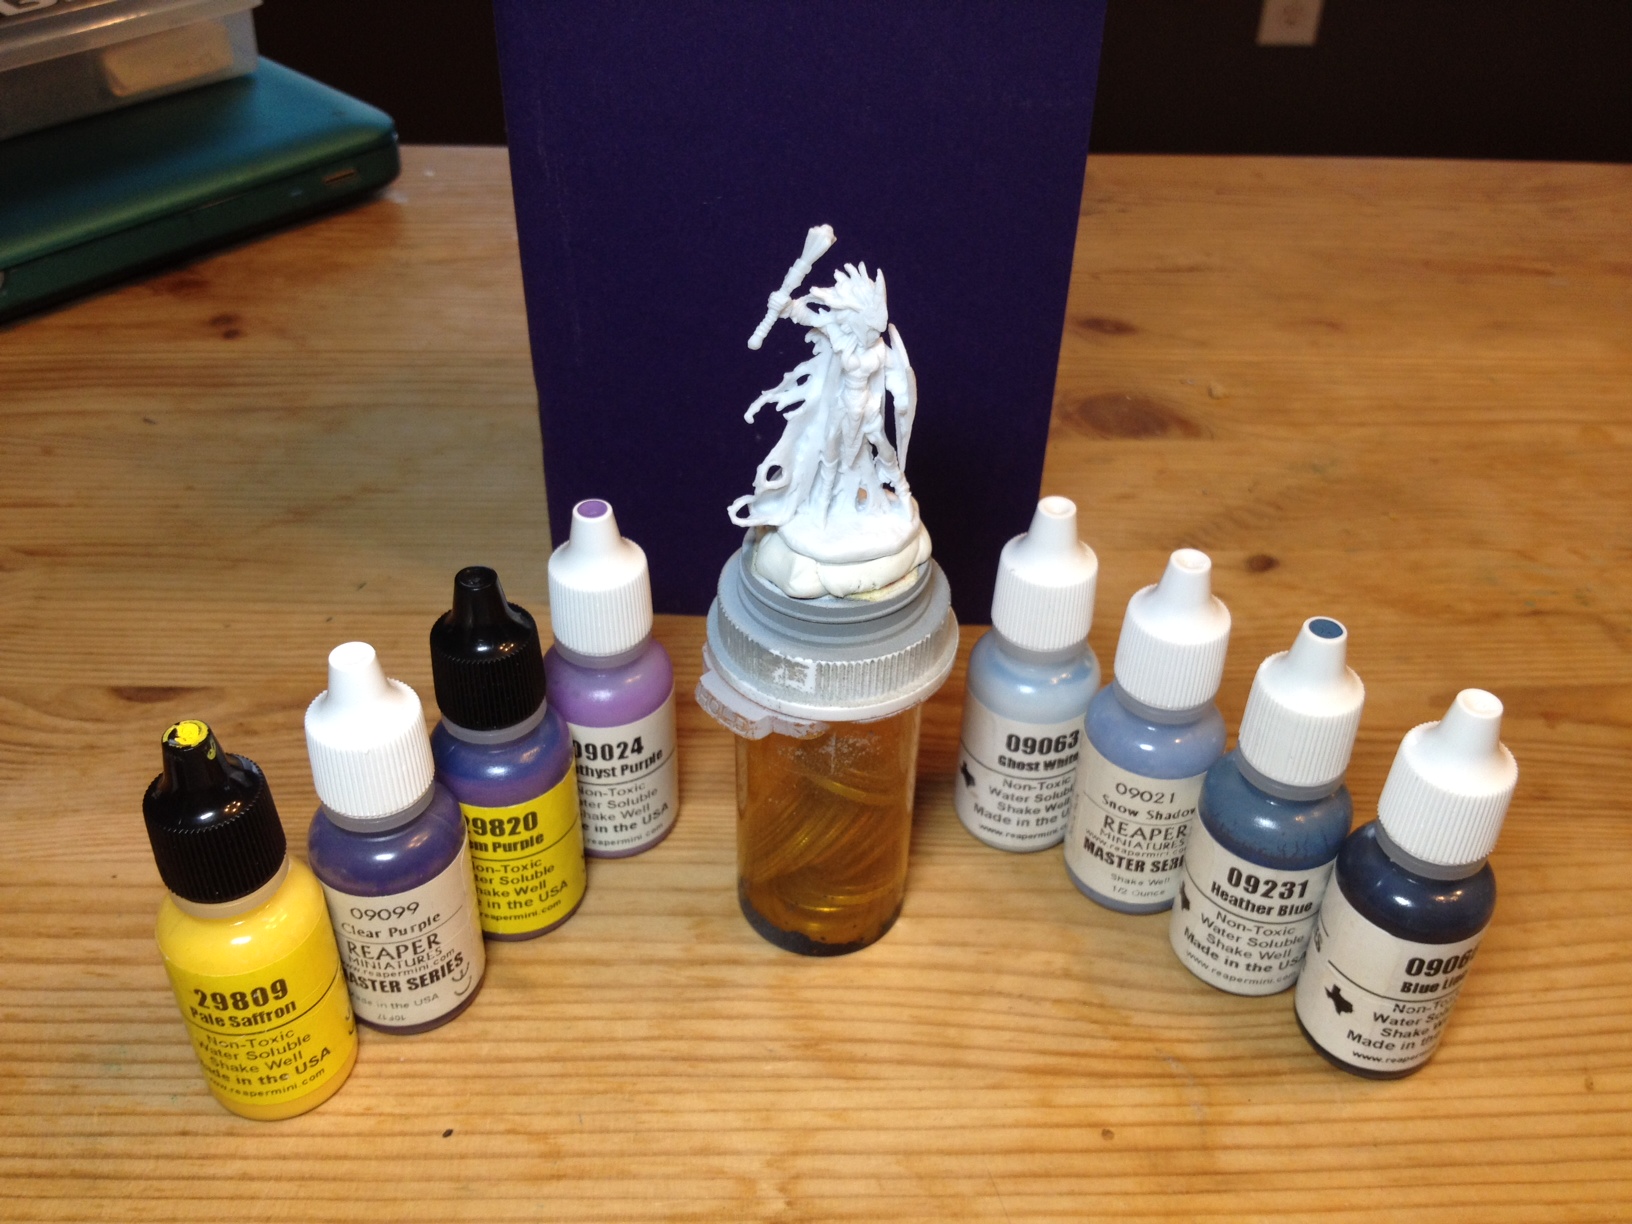
I chose a Reaper "Bones" dark elf miniature made from plastic (I find they're great for speed painting!) and decided to go with the cloud/sky theme for her Genasi character. The cape would resemble blue, shifting clouds and I'd highlight her hair & weapon in yellow to create her lightning effect. Here's the simple but versatile color scheme I chose (Not pictured: "Polished Bone" for armor detail highlights):

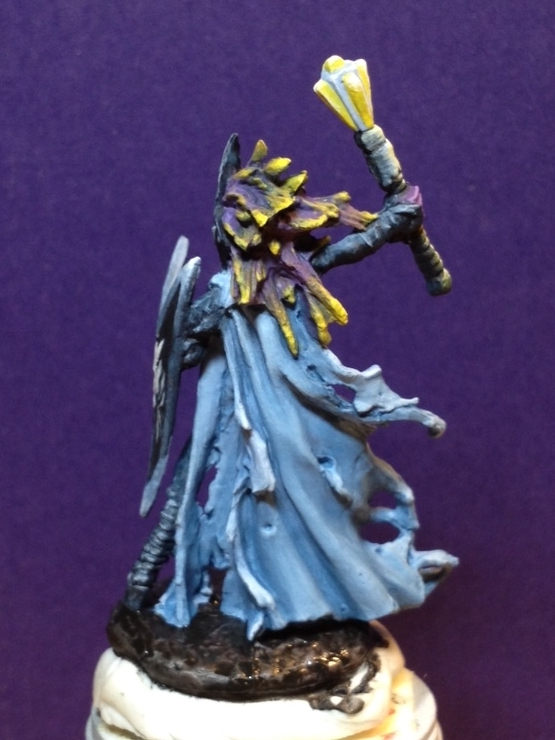
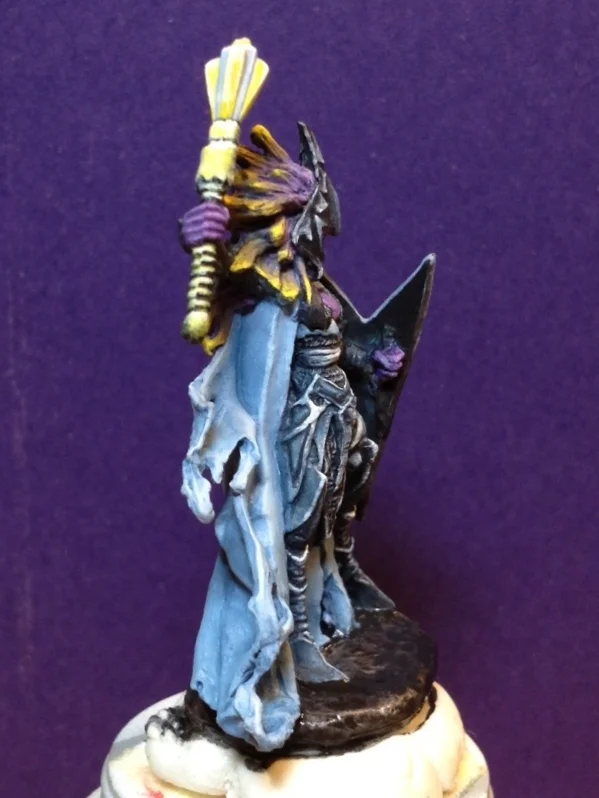
What I learned: I forgot to account for the time it would take to paint details on the middle section-- her chain mail armor & boots. I should have broken it down into four 30-minute intervals with a 15-minute final clean up at the end. I took pictures throughout and came up with this visual breakdown: 

1. Unpainted Miniature

2. Cape Basecoat

3. Block/Line Armor

4. Skin

5. Thunder "Hair" Blending

6. Thunder Weapon & Armor

7. Cape Wash & Highlights, Shield

8. Flat Color Base

While I didn't meet my original, ambitious goal of 1.5 hours, it only took me about 2 - 2.5 hours. While this miniature isn't painted in the highest quality possible, it wasn't a significant time investment-- perfect for tabletop gaming! Here's the final product:


Shaded Metallics

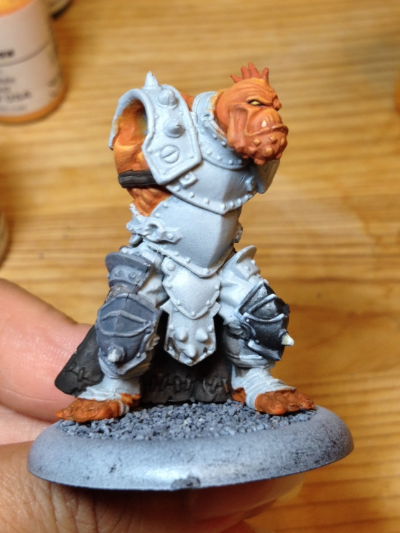
Last week I started the Troll Axer and wanted to learn more about Shaded Metallics. I did some research and here's what I found:

From what I gathered, Shaded Metallics (a.k.a. "TMM: True Metallic Metal") is a method in which one paints shades of metallic-based paints to mimic metal surfaces. (I know that sounds like the lamest definition ever but bear with me). Instead of painting a section of a mini with a few coats of the same color of metallic paint and moving on, the idea of Shaded Metallics takes it a step further. In this case, you would limit the reflection of the metallic base coat with a darker, non-metallic paint. After learning that in my research, my first thought was, "Why in the world would you undo what you just painted in in the first place?".

To my understanding, metallic paint, when applied to such small surfaces, is too unpredictable and doesn't allow for a realistic look. I found one of my miniatures that was painted with simple metallic paint and tried rotating it around under a light source-- I saw lots of reflections in both the highlighted parts and the parts that should be in partial shadow. In this case, the painter has no control over the metallic paint and it can completely derail your attempt at painting a fixed lighted source, an overall dark tone/color scheme, or can simply be too bright and distracting to the viewer (Ooh, shiny!). Just think of the new pewter mini you take out of the original package-- it's hard to make out all the details since the light reflections distort some of the shapes and obscure your ability to see each surface clearly. Once you prime the mini and neutralize the shininess (and especially if you do a quick dark wash) the details become much easier to see. 

In the past, I've tried to cut down on the metallic paint with washes of Pure Black (which I now rarely use), and I ended up with a muddy result-- Captain Dish Rag being a prime example:


"Captain Dish Rag" painted Spring 2013

Shaded Metallics isn't just about toning down the metallic paint, it's also about bringing it up with highlights. Instead of using one metallic paint in this instance, one would use two or more-- one for the base coat and a lighter metallic color for the highlights. 

Shaded Metallic Test #1: Layering 

With Troll Axer, I followed the layering technique on the right knee armor section (step-by-step below) 

  1. Painted two thin coats of metallic paint and then started shading with thin, super-dark-blue glazes. I made sure to blend the border of the matte glaze where it met the metallic base coat.
  2. Added a lighter metallic of "Polished Silver" on the upper parts of the pointed sections to show that it would reflect more light than the lower portions.
  3. Added near-white highlights on "hot spots" where I thought the most light would be reflected-- mostly in corners and top lip sections of the armor panels. This took awhile and I'm not sure if I even got the look right.

Honestly, I feel like I could have done NMM (Non-Metallic Metal) in that time it took to layer smoothly. Since it was my first time, I'm sure I'd be faster at TMM in the future, but I decided to try another idea to round out my TMM study...

Shaded Metallic Test #2: Washing 

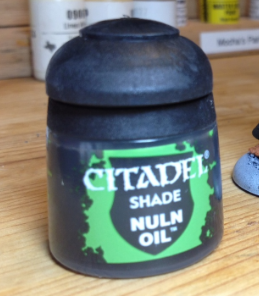
Using a wash of Citadel "Nuln Oil" Shade over the metallic base coat

I purchased this on Amazon a few weeks ago after reading about Citadel "Shade" paints:

Citadel Shades are specially formulated to flow over other paints and into the recesses on your miniatures, defining details and accentuating recesses. Once applied, they dry to provide very effective, matte shading for your models.
— http://www.games-workshop.com

It seemed pretty easy so I followed these two steps:

  1. I painted the same thin coats of the base metallic paint on the left knee
  2. Used a wash of Citadel Nuln Oil

Before I started the first round of highlights, I decided to open a bottle of Malbec and pour myself a glass while I waited for it to dry. When I returned, I gave a surprised "What the... that can't be right!". After I had spent all that time layering his other knee armor section, the wash seemed to have mimicked the look in a fraction of the time. I didn't believe it, so I painted the base metallic coat on the rest of his upper torso & shoulder armor, let it dry and applied a wash of Nuln Oil over that. I realized it wasn't just dumb luck and admitted to myself, "Oook, that's stupid-easy".

After that, I did some shading on his mid-section with that matte-dark blue from Test #1 and realized the combination of layering glazes and shade washes will yield the best results. Test #2 isn't as controlled and as clean as the #1 layering technique, but I think it pays off in efficiency. While the Nuln Oil/combo sections aren't yet highlighted, you can see how I skipped a few layering steps when comparing one knee to the other:

I know that as I continue, I'll probably use a mix of these two techniques on this miniature and see what results I can achieve as I paint over this weekend. I know there's much more for me to learn with the Shaded Metallic techniques and many happy accidents for me to discover. Overall, I think I'm off to a good start. See you next Miniature Monday!